Get Your Asana Client ID and Secret
Sign-in and open the Developer App Console
Sign in to your account, you will need email and password to log in.
Click on your profile picture in the top right corner, then select Settings from the dropdown menu.
In the Profile Settings dialog, navigate to the Apps tab.
Scroll down to the bottom of the Apps tab and click on the View Developer Console link. This will take you to the Developer App Console.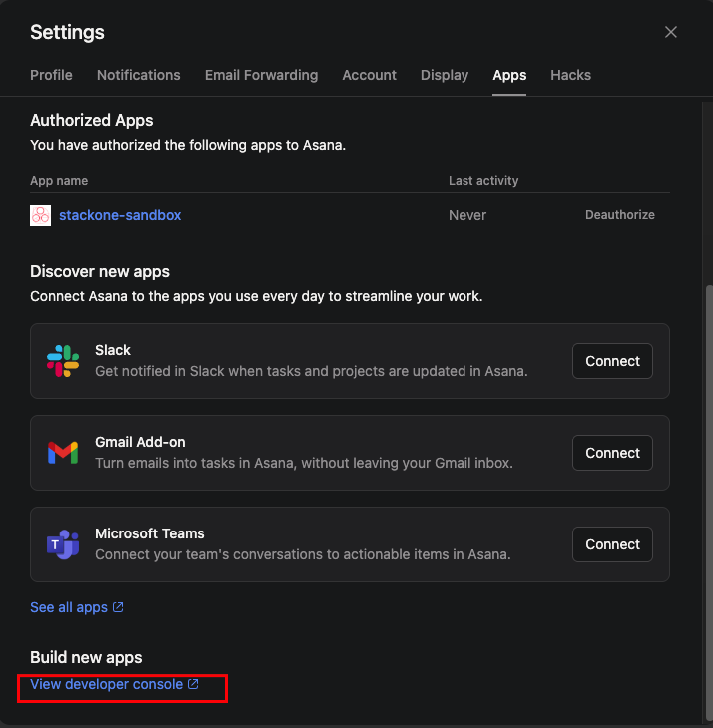
Create new app
In the Developer App Console, click on the + Create New App button under the Apps section.
In the dialog that appears, enter a name for your app (e.g., “StackOne Integration”) and click on the Create App button.
Once the app is created, you will be taken to the app’s settings page where you can find your Client ID and Client Secret.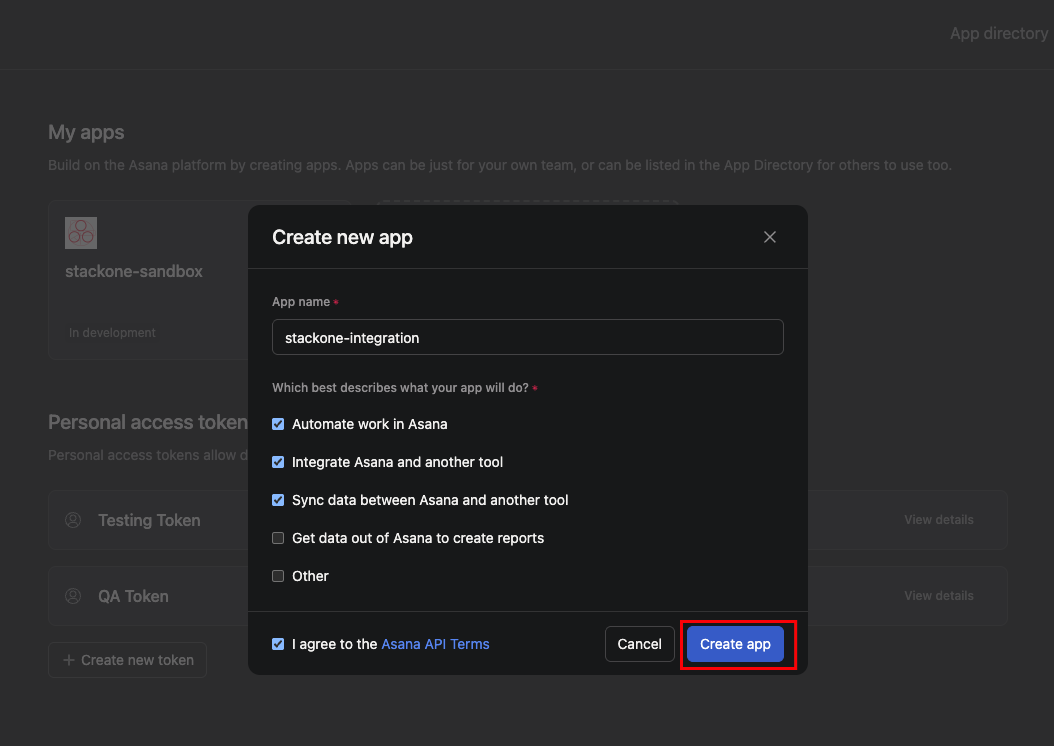
Add redirect URL and add required scopes
In the app’s settings page, navigate to the OAuth sidebar menu. Scroll down to the Redirect URLs section and click on the Add Redirect URL button.
Enter the following redirect URL: 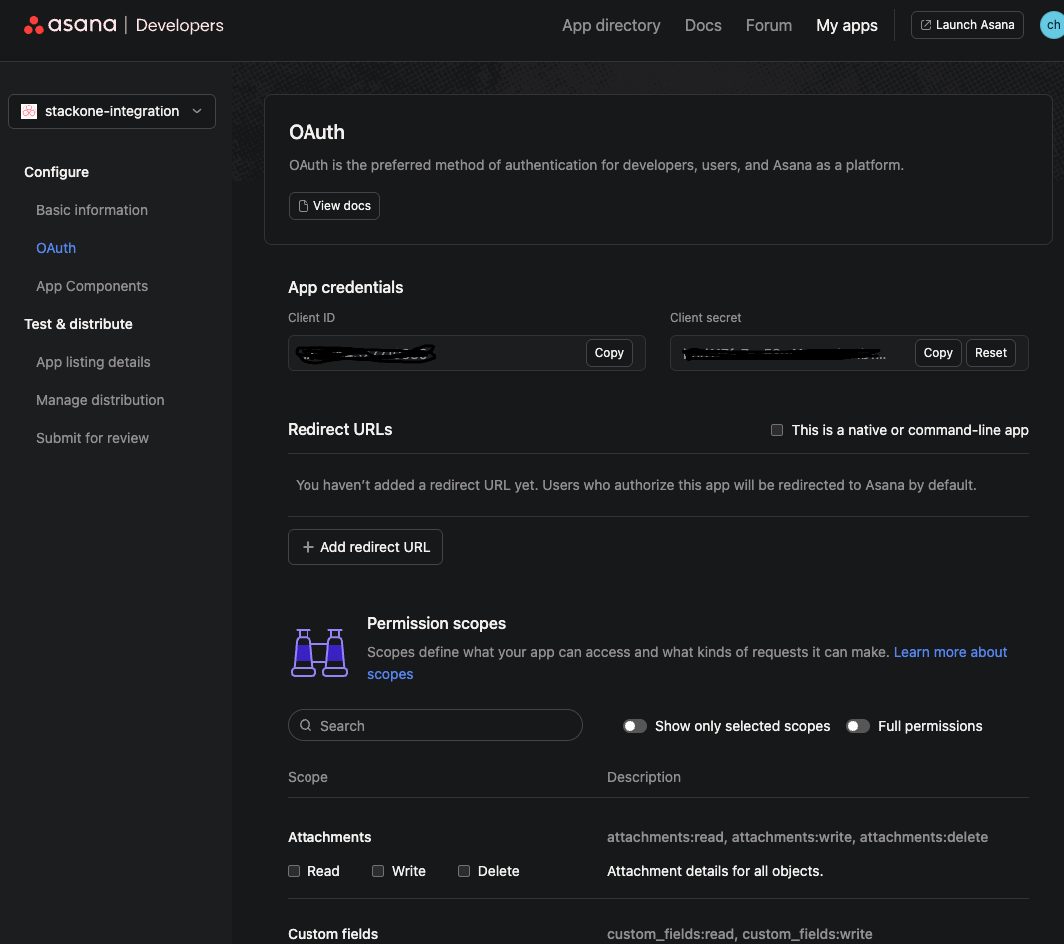
https://api.stackone.com/connect/oauth2/asana/callback and click on the Add button to save it.
Additionally, ensure that you have selected the required scopes for your integration or simply enable full permissions by clicking on the Full Permissions toggle.Get your Asana Workspace ID
Navigate to your workspace
In Asana, click on your profile picture in the top right corner, then select Switch Workspace from the dropdown menu.
Select the workspace you want to integrate with StackOne.
Once you are in the desired workspace, look at the URL in your browser’s address bar. The URL will be in the format 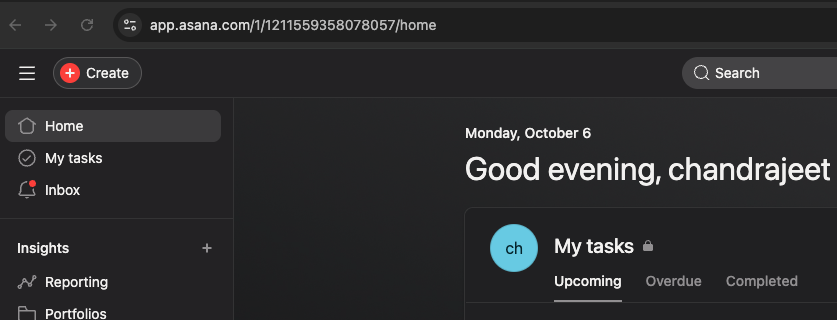
https://app.asana.com/1/{workspace_id}/home.
The number before /home is your Workspace ID. Copy this ID for later use.Use the Client ID, Secret, and Workspace ID in the StackOne Hub
In the StackOne Hub, navigate to the integration settings for Asana. You will need to provide the following information:- Client ID: The Client ID you obtained from the Asana Developer App Console.
- Client Secret: The Client Secret you obtained from the Asana Developer App Console.
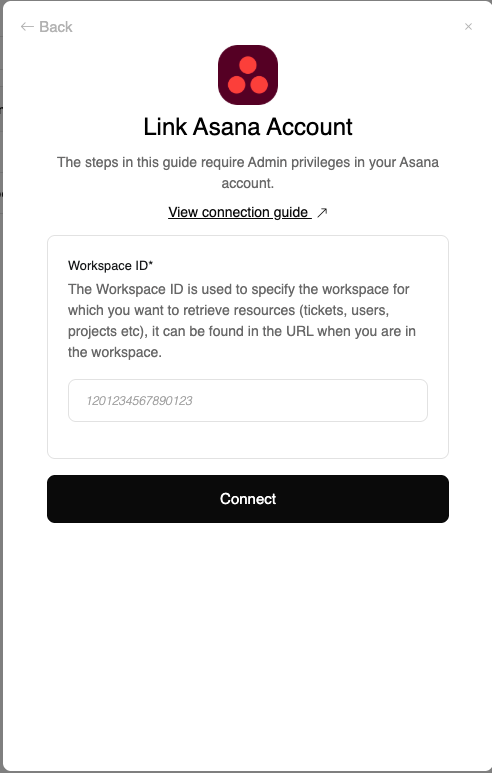
- Workspace ID: The Workspace ID you obtained from the Asana URL.
Save the integration settings
Go to the StackOne Hub > Integrations section and Fill in the required fields with the Client ID, Client Secret and Scopes (optional)for Asana integration.
Click on the Save Changes button to save your settings.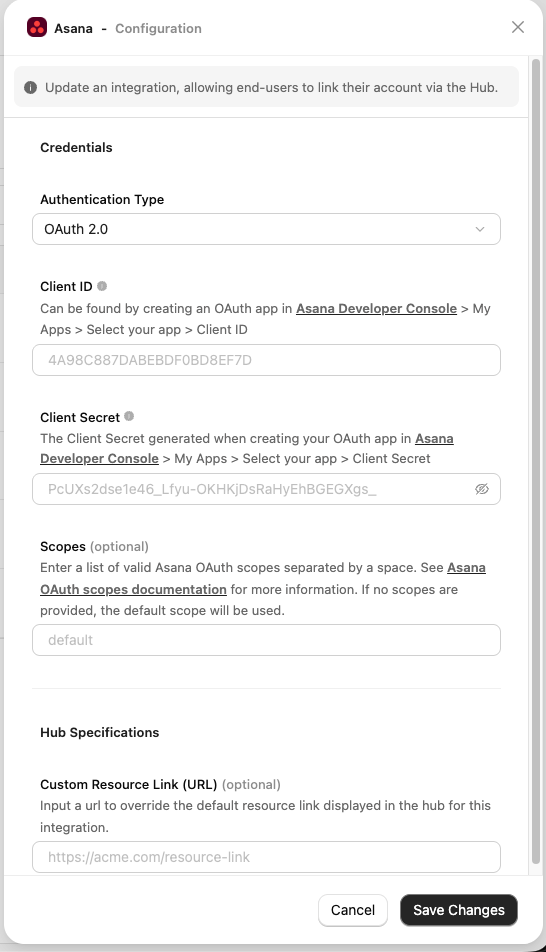
Navigate to the Accounts section
Navigate to the Accounts section and click on the Link Account button.
From the list of available integrations, select Asana.
Congratulations, you’re all set! If you face any issues with the steps mentioned above, please contact us by emailing integrations@stackone.com. We’re always here to assist you!